

Discover the latest industry news and audio post production.

We were approached by the Full Spectrum centre to design original sounds of music for their range of sound therapy treatments.

November 21, 2021
We are pleased to share with you an update on a unique project that we have recently completed. We were approached by the Full Spectrum centre to design original sounds of music for their range of sound therapy treatments. The treatments focus on each of the 7 chakras and use accompanying sounds that align with the fundamental characteristics of each chakra.
As you can imagine, this was a very interesting project and not the kind of thing we get to be involved with that often, so we are really enjoyed working on this brief. The team came to this project with a fairly basic understanding of the 7 chakras, so as part of our pre-production, we met with the Director of The Full Spectrum Centre Joanne Lee to go over each of the 7 Chakras, how the treatments will be used and her vision for how each should sound.

After this initial briefing, we had a good idea of the approach we should take for each Chakra.
Root chakra - Focusing completely on simple rhythms, uses shamanic drum beats playing in a hypnotic pattern. The only instrument used is the African Bolon which plays a single low bass note.
Sacral chakra - Still focusing on rhythms but the drums have more groove and syncopation to them. Introduce musical elements in the form of tuned percussion instruments, mallets and slates.
Solar chakra - Beginning to become more musical. We bring in several new instruments such as guitar, gamelan, flutes and synth pads. The music is starting to become more melodic and tonal as we move through the chakras.
Heart chakra - The heart chakra is the middle point and has a feeling of balance and calm. We mainly focused on wind instruments for this Chakra and also had a steady bass pulse underneath to signify the beating heart.
Throat chakra - The throat chakra is very ambient and builds atmosphere through sparse singing bowl hits and ringing chimes. We also have a large number of vocal lines that come in and out, interweaving with one another.
Third Eye chakra - By now we have moved away from rhythmic and melodic elements completely and are now focusing on stacked synth chords. The third eye features arpeggio scales going up and down in sync with each other to give a sense of expanding consciousness and cognition.
Crown chakra - Our finale is the crown chakra. Here we wanted it to feel like your consciousness is being uploaded into a higher realm, so we focused almost entirely on a single synth chord that builds and builds in intensity, with new textures and timbres fading in. We also added a vocal element to this chakra to give it an angelic feeling.
As well as these musical elements, we also developed some sonic tones that would play over each chakra. These contained elements of Binaural beats as well as frequencies that matched the resonant frequencies of each Chakra.

We had a great time developing this project, and it was a nice departure away from our usual kind of thing. Overall we are really pleased with how the final piece came together and we have enjoyed the experience of learning more about the 7 chakras and sound therapies. Hopefully, we will get a chance to work on a similar project in the future!
I met with Alex and Jack, a very talented duo who listened and took on board my vision and dream. The project would create a new and unique digital sound bath delivered as a live stream on Zoom, individual sound therapy sessions for clients to experience face to face or again as a live stream on Zoom and finally the core audio sessions for our Full Spectrum Journey Through the Chakras™, an 8-week energetic balance program. In just 3 weeks 7 x 30 minute sound therapy tracks, one for each chakra, a 30 minute digital sound bath and a 60 minute combined chakra sound therapy track were designed, created and delivered and I am completely blown away by them. Alex and Jack have exceeded all my expectations, they have interpreted my ideas, requirements and criteria in ways I never imagined.
Joanne Lee - Director of The Full Spectrum Centre

As well as this great feedback from Joanne, we were also thrilled to read some of the feedback from clients who had tried the sound therapy treatment!
I have been suffering badly with sciatica and was unable to get to the centre for my weekly treatment. So Jo suggested we do something via zoom called The Full Spectrum Journey through the Chakras: Root chakra sound therapy session. Although I’ve never had anything like this before I was very open to it and lay down comfortably on my bed. At this point, my pain was a 7.5 out of 10. I had my headphones on and the music started with the sound of drums. Well, I can honestly say I’ve never experienced anything like it and it was an experience rather than a session. I had my eyes closed and actually saw in my mind's eye a golden light hand go into the area of pain and pull it out. It was absolutely incredible the music just took me somewhere else. Anyway, the outcome was I had no pain after at all and I can’t wait to have another session with different chakras with the sound therapy as I suffer from fibromyalgia, arthritis and disc degeneration. I can’t recommend this enough. Thank you Jo I feel honoured that I was the first person to try this therapy."
Wow! It makes us really happy to know that our music and sounds are helping people to deal with their pain and feel better.
We hope you enjoyed this article!
For more about the Full Spectrum Centre and their work check out their website: https://fullspectrumcentre.co.uk/full-spectrum-sound-therapy-project/

In this interview, our lead audio craftsman Alex Gregson talks about working with Devin Townsend, his favourite pieces of equipment and tips for newcomers in the industry.
November 3, 2021
We are very pleased to share with you this interview with Extended View Studios. In this interview, our lead audio craftsman Alex Gregson talks about working with Devin Townsend, his favourite pieces of equipment and tips for newcomers in the industry.
We hope you enjoy this interview!
Discover the top 5 online sound effects resources—Soundly, Pro Sound Effects, Soundsnap, A Sound Effect, and Freesound—to streamline your search and enhance your projects.
December 5, 2018
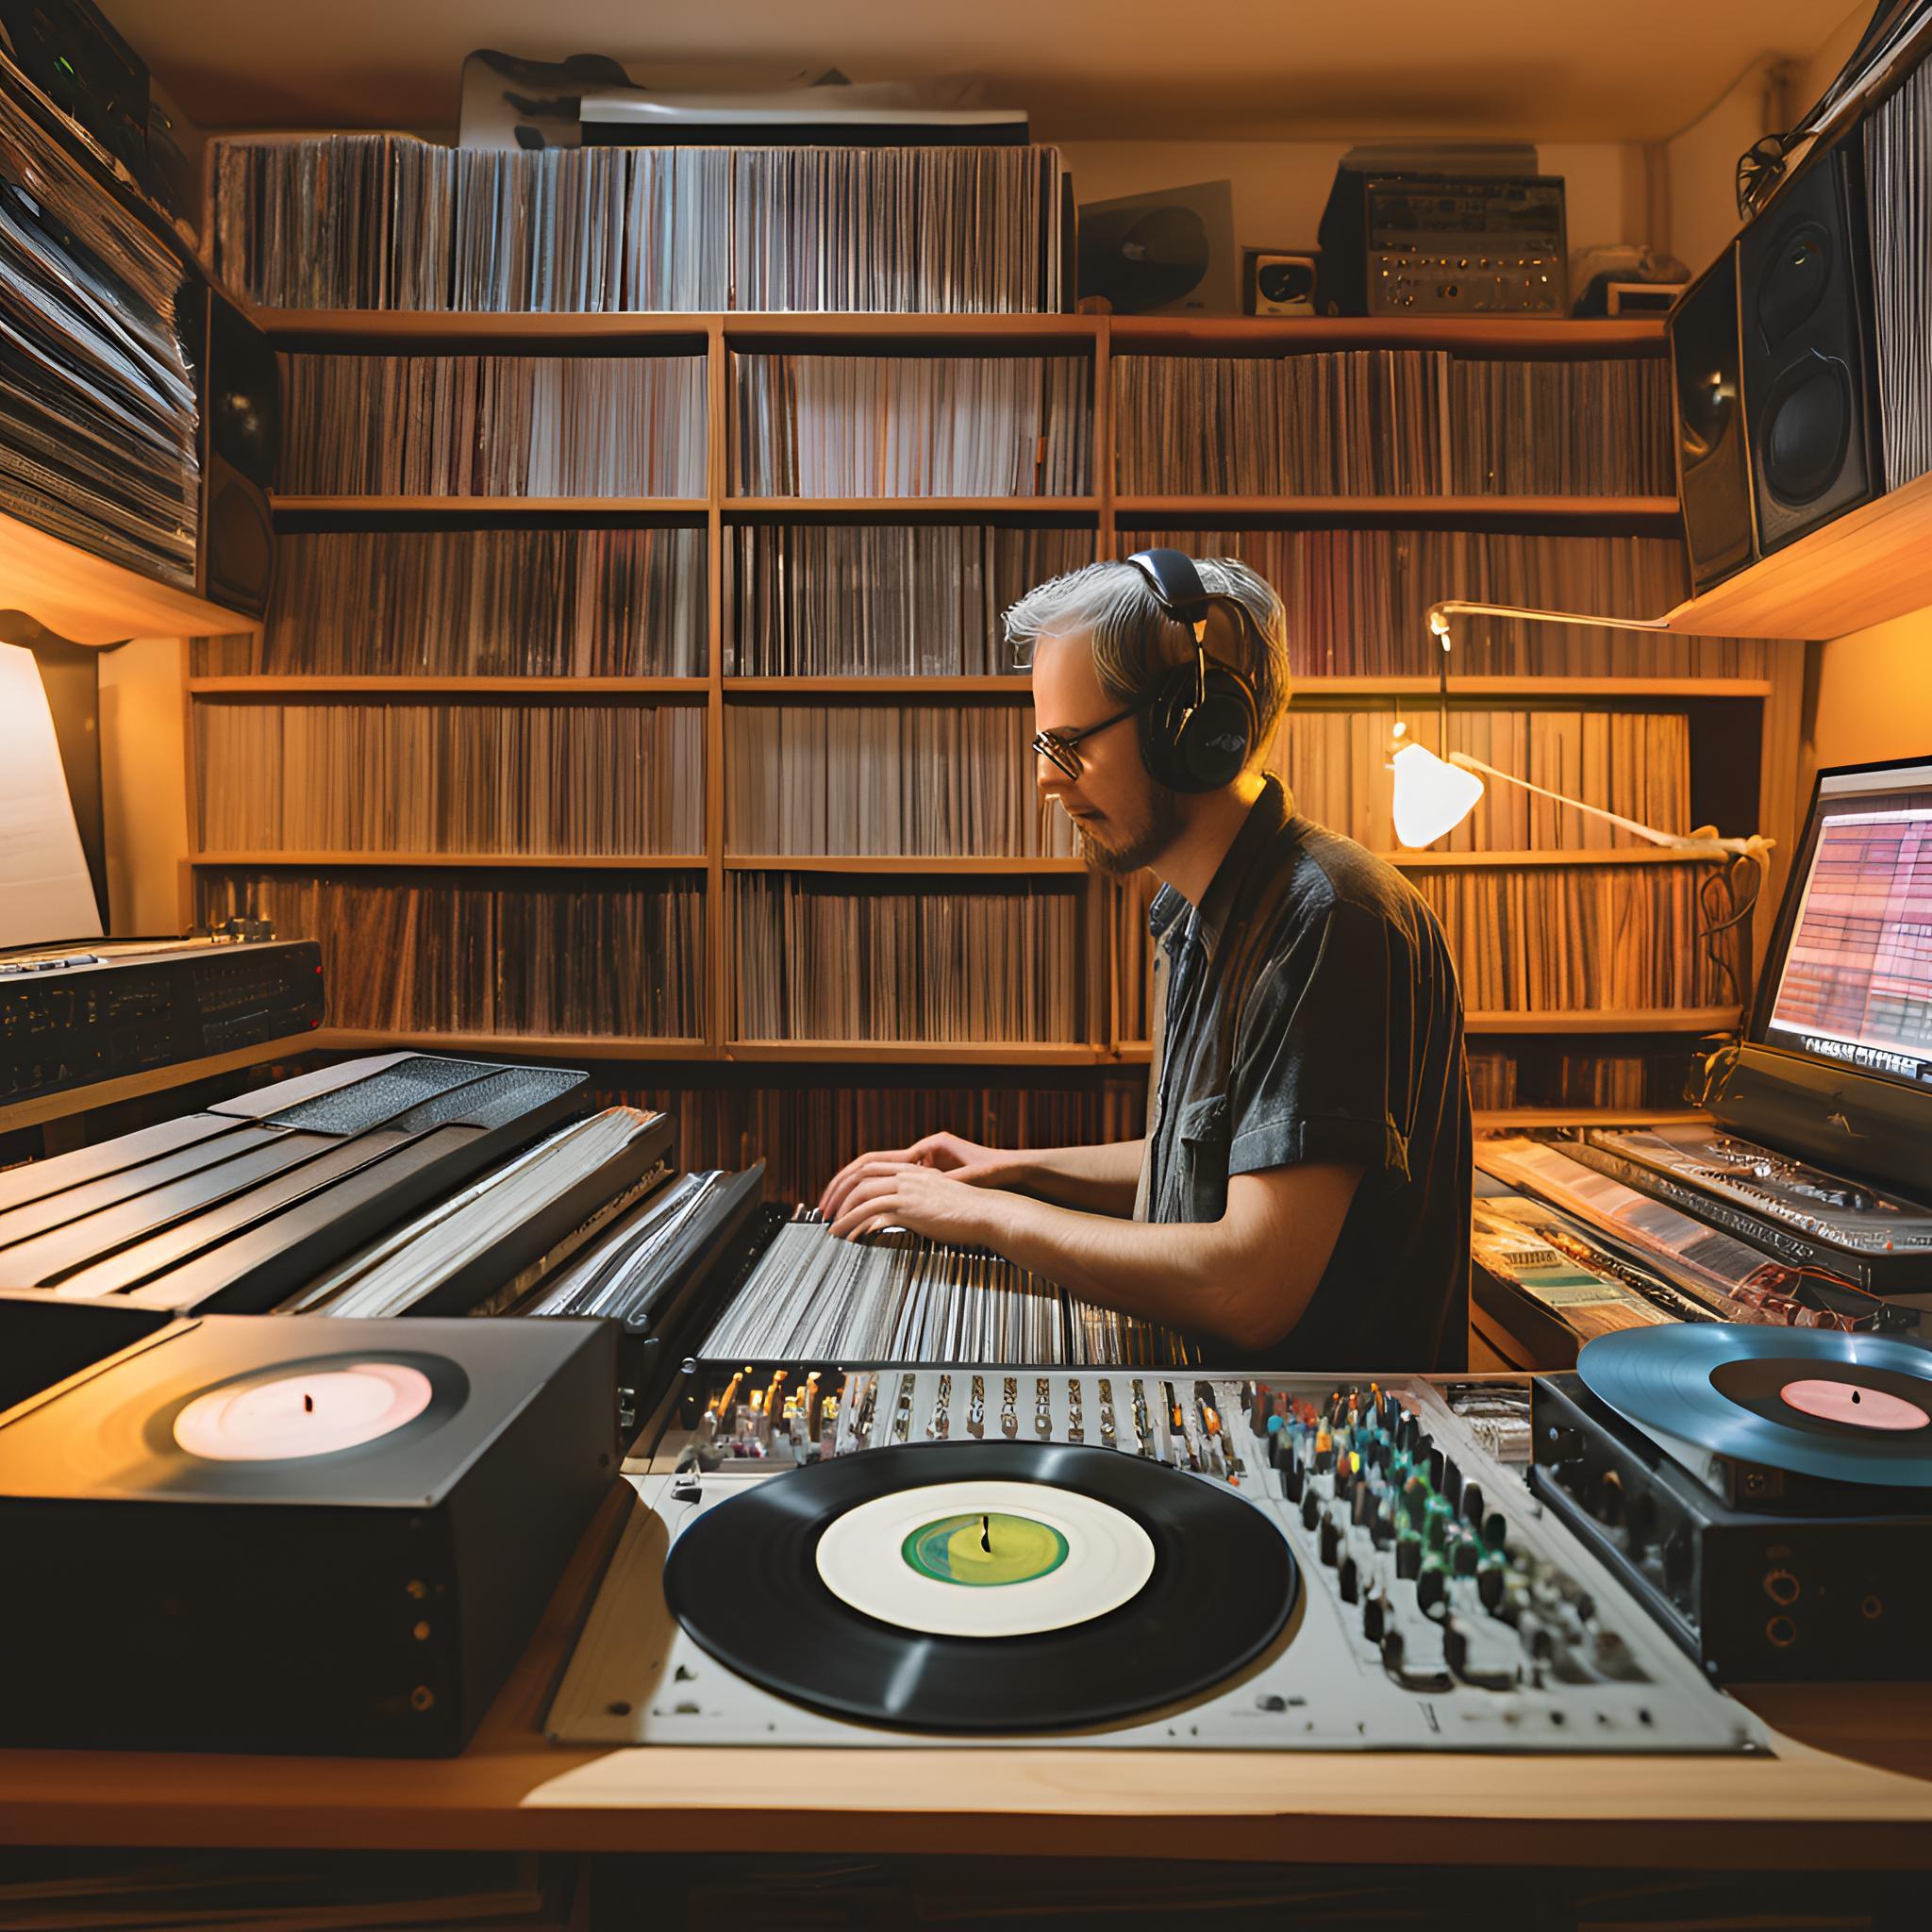
If you're looking to make finding sound effects easier, here are a few places you can start. In this article, we will take you through our top 5 online sound effect resources so that you can spend less time searching and more time creating.
IMPORTANT NOTE: We have created an up-to-date list of the best sound effects resources, including a more in-depth look at all the options to help you make the right decision.
Soundly is a fully featured sound effects platform for Mac & PC. This is our go to SFX search software for our own sound effects. We also use their online library a lot. Soundly allows you to search through all of your offline sound effects, as well as simultaneously searching through its online library. Basic soundly accounts are free, with pro subscriptions at $14.99/month.
Pro Sound Effects online store contains Sound Effects expertly crafted by industry veterans. You can download individual sound effects from their online library of over 250,000 sounds - either a la carte or with a monthly subscription - and you can purchase full sound effects libraries from their main site.

Soundsnap is an extensive library with a huge range of independent Creator’s contributing their work to a monthly subscription model. Soundsnap focuses solely on professional sound effects so you can feel confident knowing that you're paying for quality. They have two payment models: Pay as you go ($15 for 5 downloads or $3 per download) and a monthly subscription ($35 per month or $199 annually which gives you unlimited downloads)
A Sound Effect is an online vendor of a multitude of libraries from all levels of creators which is useful for finding specific libraries for projects. In addition to sound libraries, they also have a ton of interesting and useful written content for inspiration. Access to A Sound Effect is free, libraries are individually priced.
Freesound is a free resource that offers sound effects from a multitude of contributors, some professional, some hobbyists. It can be hard to find high quality effects, but there are some gems in there. All of the CC0 licensed sounds can be searched through Soundly.

344 SFX is a specialist sound effects store created by the award-winning team at 344 Audio. The platform focuses on unique sound effects crafted for modern film, television and game production, prioritising detail, character and cinematic quality over sheer quantity. Each library is created by professional sound designers working in the industry, delivering production-ready sounds designed to integrate seamlessly into professional workflows. Libraries are available for individual purchase.
We hope you find these 5 resources useful! Let us know your favourites below in the comments section.
IMPORTANT NOTE: We have created an up-to-date list of the best sound effects resources, including a more in-depth look at all the options to help you make the right decision.

Create spine-chilling horror sound effects using everyday items, atonal instruments, and vocal manipulations for maximum eerie impact.
October 22, 2018
Happy Halloween humans! In today’s blog we’re going to give you some tips and tricks for making those spooky sound effects that send a shiver down your spine. There are many methods you can use to create these bone chilling sounds, but here are few of our favourites!
Vegetables, fruits and meats sound like human flesh. Snapping celery, crushing fruit and handling meat will give you an authentic fleshy sound. A word of advice before you go stabbing chicken breasts or smashing pumpkins; destroy with caution. Use a barrier between your veggies and the surface you are destroying it over. Opt for an old towel or blanket over anything noisy like a plastic tarp. This will help contain the mess and prevent stains. Not only is this a fun way to make sound effects, but its also a great stress reliever!
One of the most common instruments used to create horror sound effects is the waterphone. Unfortunately, their uniqueness comes with a hefty price tag. Luckily, there are many other options! All instruments can be pushed beyond their intended use or played outside of musical scales to achieve creepy effects, especially with added reverb and pitch shifting. One of our go to instruments for horror is the violin, although the bow is a great tool in itself for making creepy sounds when used on any resonant object.
If you're in a pinch with no extra vegetables, fruits, meats, or instruments lying around, don't fret! Your voice can be one of the best tools for scary sounds. Screams, zombie vocalisations, ghostly moans and screeches.
Try pitching your voice down or processing with Krotos Audio's Simple Monsters plugin to achieve that monstrous effect. We've had a lot of fun with voice manipulation, and so can you! Head over to www.krotosaudio.com for 50% off today!
This guide covers how to deliver audio and video assets to a sound design team, including proper file organization, exporting in Avid DNxHD format, ensuring timecode synchronization, and using reliable file-sharing services.
October 9, 2018
After many years working alongside clients with varying levels of experience, it has become apparent to us that a well structured, hassle free guide is needed on how to deliver assets to an Audio Post Production Studio.
This guide is intended for filmmakers/editors wanting to learn good practise on their workflow, as well as post production sound professionals who want a coherent guide that they can send to clients. This will save you hours of explanation.
One necessary step in achieving a great soundtrack is the hiring a professional Location Sound Recordist. If dialogue (and sometimes sound effects) are captured effectively on set, it leads to the availability of metadata, and multiple microphone options, which are two crucial ingredients in your turnover to your Audio Post Production Studio.
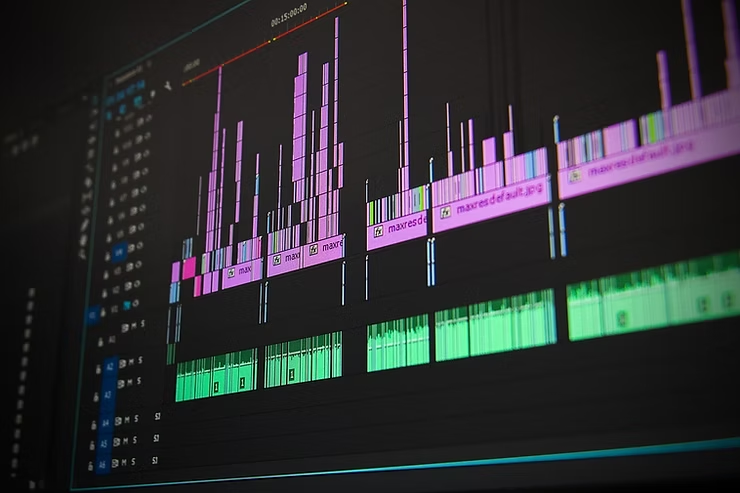
When editing your film, keep dialogue, sound effects and music on separate tracks so that the AAF/OMF file we describe in the following section is organised upon delivery. You should never delete alternative mic options from the dialogue tracks, as your sound team may be able to use these later. When editing, audio synchronisation is crucial. Once you have synchronised your dialogue, the video and audio regions should stay linked so avoid sound slipping out of sync in your editing software.
Upload all of the audio rushes (audio takes recorded on set) to a file sharing service with a service like Google Drive, which will allow your sound team to stream selected files online and download if needed.
Complete the final locked edit of your project (this can be pre Colour Grading or Visual Effects). Completion of your final locked edit before audio delivery will ensure the most seamless workflow with your Audio Post Production Studio.
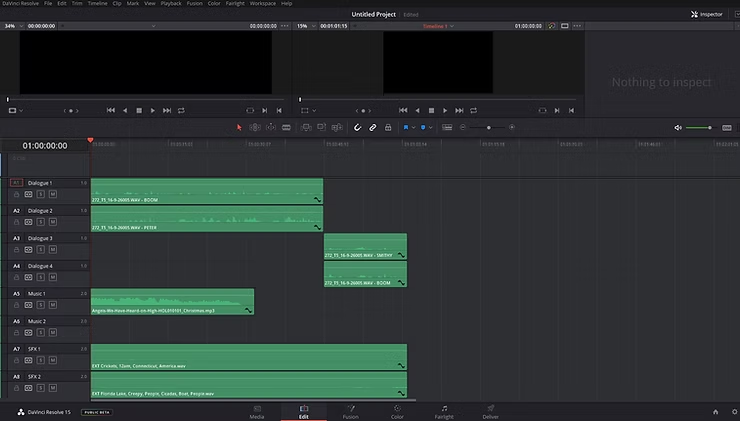
Place all current dialogue tracks, ADR, voice over, sound effects and music at their desired timecode position in your editing session.
Place a 1kHz sine wave, 1 frame in duration, 2 seconds before the video region starts. When the final mix is delivered by the Audio Post Production Studio, you can use the sync tone in your edit and match it with the one present in their mix to achieve perfect synchronisation.
The video region should start at timecode 01 00 00 00, unless your distribution specifications say otherwise.
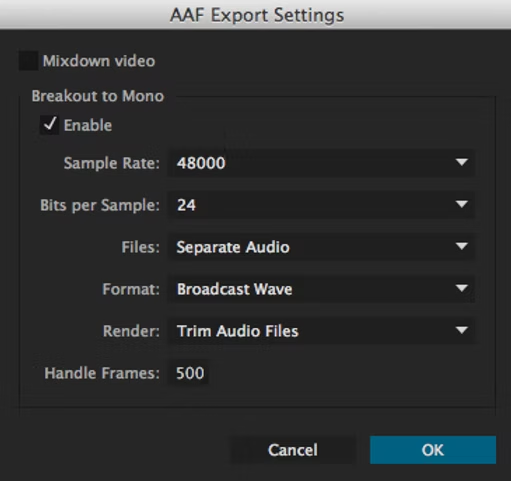
Navigate to your software’s AAF/OMF export window (as shown below), and select the following settings:
This file will allow the sound team to access all of your audio edits, volume key frames and extend takes within clips (it is comparable to an XML file). The better organised it is before delivery, the happier your Audio Post Production Studio will be, and the more time they will have for creative tasks.
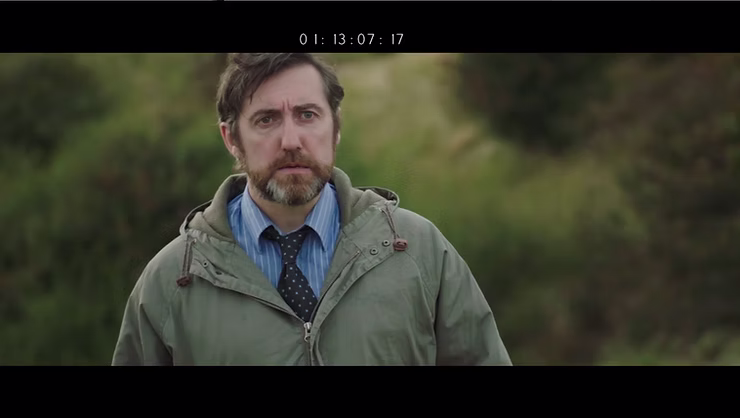
Add a timecode indicator to your video, placed inside the visual ‘letterbox’ (or where it would be) at the bottom or top of the frame.
The audio attached to your video file will need to match the AAF/OMF file, so retain all dialogue tracks, ADR, sound effects and music at their desired timecode position in your editing session.Navigate to your software’s video export window, and select the following settings:
Keep all of these assets on an online file sharing service with no deletion date, and avoid using zip/rar archives. This is to reduce the risk of download corruption or lack of access. Ensure that the Audio Post Production Studio have checked and approved your assets before the start date of Audio Post.
So there it is! A simple and efficient guide to delivering assets to the sound team for your project. If anyone wants to add any additional points, feel free to comment below.