
After many years working alongside clients with varying levels of experience, it has become apparent to us that a well structured, hassle free guide is needed on how to deliver assets to an Audio Post Production Studio.
This guide is intended for filmmakers/editors wanting to learn good practise on their workflow, as well as post production sound professionals who want a coherent guide that they can send to clients. This will save you hours of explanation.
One necessary step in achieving a great soundtrack is the hiring a professional Location Sound Recordist. If dialogue (and sometimes sound effects) are captured effectively on set, it leads to the availability of metadata, and multiple microphone options, which are two crucial ingredients in your turnover to your Audio Post Production Studio.
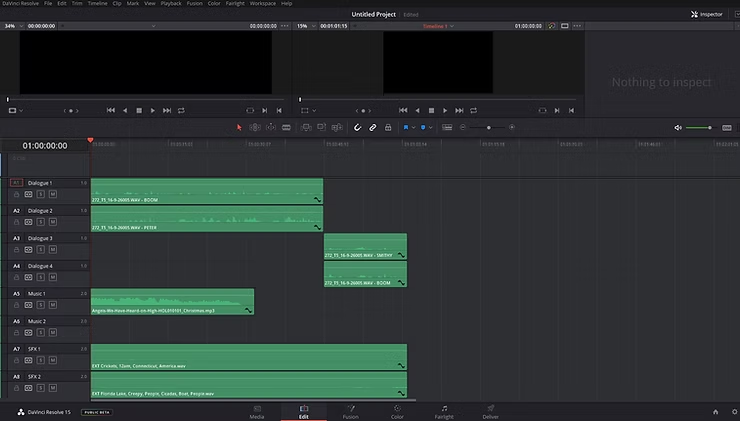
When editing your film, keep dialogue, sound effects and music on separate tracks so that the AAF/OMF file we describe in the following section is organised upon delivery. You should never delete alternative mic options from the dialogue tracks, as your sound team may be able to use these later. When editing, audio synchronisation is crucial. Once you have synchronised your dialogue, the video and audio regions should stay linked so avoid sound slipping out of sync in your editing software.
Upload all of the audio rushes (audio takes recorded on set) to a file sharing service with a service like Google Drive, which will allow your sound team to stream selected files online and download if needed.
Complete the final locked edit of your project (this can be pre Colour Grading or Visual Effects). Completion of your final locked edit before audio delivery will ensure the most seamless workflow with your Audio Post Production Studio.
Place all current dialogue tracks, ADR, voice over, sound effects and music at their desired timecode position in your editing session.
Place a 1kHz sine wave, 1 frame in duration, 2 seconds before the video region starts. When the final mix is delivered by the Audio Post Production Studio, you can use the sync tone in your edit and match it with the one present in their mix to achieve perfect synchronisation.
The video region should start at timecode 01 00 00 00, unless your distribution specifications say otherwise.
Navigate to your software’s AAF/OMF export window (as shown below), and select the following settings:
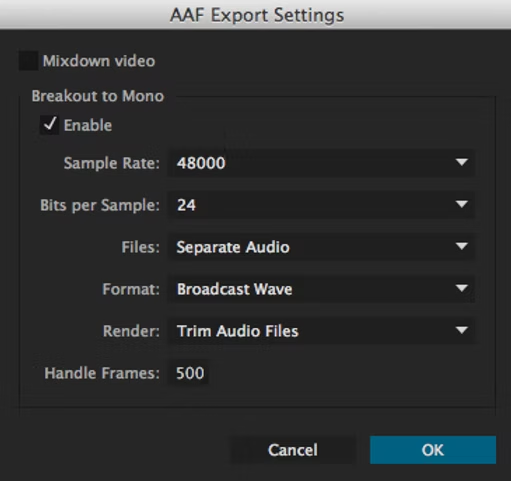
This file will allow the sound team to access all of your audio edits, volume key frames and extend takes within clips (it is comparable to an XML file). The better organised it is before delivery, the happier your Audio Post Production Studio will be, and the more time they will have for creative tasks.
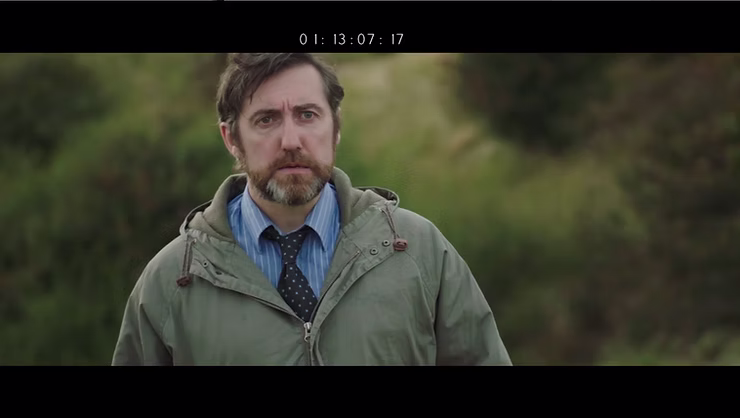
Add a timecode indicator to your video, placed inside the visual ‘letterbox’ (or where it would be) at the bottom or top of the frame.
The audio attached to your video file will need to match the AAF/OMF file, so retain all dialogue tracks, ADR, sound effects and music at their desired timecode position in your editing session.Navigate to your software’s video export window, and select the following settings:
Keep all of these assets on an online file sharing service with no deletion date, and avoid using zip/rar archives. This is to reduce the risk of download corruption or lack of access. Ensure that the Audio Post Production Studio have checked and approved your assets before the start date of Audio Post.
So there it is! A simple and efficient guide to delivering assets to the sound team for your project. If anyone wants to add any additional points, feel free to comment below.

344 Audio is an Audio Post Production Company in Manchester.
If you enjoyed this post, discover our Ultimate Guide to Audio Post-Production.
Curious to hear our work? Listen to our portfolio.
Eager to learn more about audio post production and sound design? Explore our Audio Post Essentials Course at 344 Academy.
We also have unique sound effects available for purchase.