

Discover the latest industry news and audio post production.

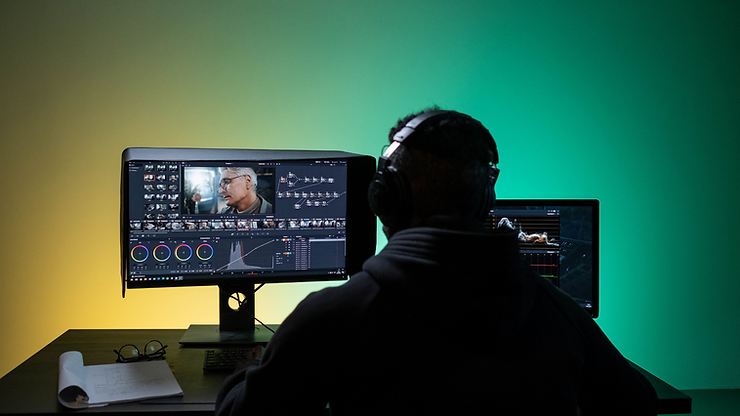
We review Extract: Dialogue, a noise reduction tool powered by Artificial Intelligence algorithms to separate dialogue from a wide range of background noises.

May 12, 2023
Dialogue is king. No matter how hotly debated Noise Reduction technology can be, having a strong, consistent dialogue track is a hugely important part of the post production process. Noise reduction can be a useful tool to achieve this in ways such as eliminating the need for ADR or simply removing that annoying bird from the background of the perfect take. Today we're taking a look at Acon Digital's latest offering for this; Extract:Dialogue.
Company: Acon Digital
Product: Extract:Dialogue
Price: £80
Our Rating: 4.8/5
Extract: Dialogue is a noise reduction tool powered by Artificial Intelligence algorithms to separate dialogue from a wide range of background noises. In the last few years A.I powered plug-ins have become common place in the industry, leading to a huge range of products available on all ends of the price spectrum. However, after just a few minutes with the plug-ins well laid out and incredibly simple interface, it's clear Acon Digital's offering has been designed with ease of use and efficiency at the forefront of their mind.
In their own words:
Extract:Dialogue is a plug-in that separates dialogue from common types of background noise such as wind, rustle, traffic, hum, clicks and pops. The algorithm works in real time and is based on deep learning. It has been trained on thousands of high-quality voice recordings and an equally extensive set of common noise sources. The extensive training enables the artificial intelligence to automatically distinguish dialogue from noise without user interaction. This makes Extract:Dialogue extremely easy to use – just add it to your dialogue bus and let it do its magic.
One of the first thing you'll notice upon opening Extract:Dialogue is the clean layout of the interface; made up of a Spectrum Analyzer, a small amount of adjustable parameters, a Solo Noise button and Three frequency band filters, all of which have a small description pop up if you hover over the parameter. This makes the tool quick, easy and doesn't give you much to get distracted by.
The adjustable parameters are small in number (5 in total), mostly due to the fully automatic nature of the plug-in. However, they do cover everything you'll need to have control over in order to get some good results in a short amount of time. These controls are: Sensitivity, Maximum Attenuation and Frequency Band Filters.
Extract: Dialogue will be of great use to anybody working with dialogue not just in film and TV but also radio/podcasting, games and live broadcast. The real time and automatic nature of the plug-in can allow you to get the settings you need very quickly, whilst also being able to make adjustments on the fly if needed.
The simple and well laid out interface makes it incredibly accessible to creatives of all levels who may not have the time or budget to dig into other advanced noise reduction tools such as Izotope RX or Cedar DNS.
We would use this plug-in for Dialogue Editing tasks. Particularly when noise cannot be attenuated through other methods or if another plugin is not providing the expected result.
Acon Digital's approach of developing a tool with a very specific use case makes Extract:Dialogue a breath of fresh air in the Noise Reduction market. The powerful algorithm is well developed and paired with its simple (all be it a little dull looking) user interface, users can easily adjust the settings to achieve the desired results in a quite impressive amount of time.
In regards to the U.I, it would have been nice to see more colour and perhaps a 3D spectrogram to separate it from other tools with less than inspiring colour schemes and graphics.
As a team who use products that fall in a variety of price ranges, the value for money you get with Extract:Dialogue is one of its strongest selling points. Acon Digital have managed to create a product you can achieve comparable results to the most expensive noise reduction options with, at a very small fraction of the cost.
Extract:Dialogue is available as a stand alone plugin or as part of Acoustica - Digital Audio Editor.
For more from Acon Digital and the purchase information for Extract:Dialogue follow these links:
https://acondigital.com/products/extract-dialogue

Explore how Foley Artists collaborate with the sound department—working with Supervising Sound Editors, Re-Recording Mixers, and Sound Designers to craft immersive, high-quality film audio.

April 7, 2023
The majority of a film’s sound is added during audio post-production sessions. This article by The New Yorker points out how Foley effects, in particular, are tailored to a film. They’re also typically synchronised to the movements of characters, which can include the sound of someone dancing, eating, or rolling over in bed. Traditionally, Foley Artists are tasked to record these kinds of sounds. Although Foley Artists remain steadfast in analogue techniques, like using physical props, The New Yorker article stated that technology had altered the process of recording, editing, and engineering sounds.
Now, interestingly, in her 2020 interview with the Royal Television Society, British Foley Artist Ruth Sullivan explained that, with this profession, “You need to be able to adapt: to working on different types of programmes, which make different demands of you; to the people you work with; and to the facilities available.”
All that considered, it’s clear that producing great and detailed Foley effects requires Foley Artists to collaborate with various professionals from the sound department. In this article, we’ll expound on which roles can help enhance Foley effects.

As our post outlines, the supervising sound editor has a vital role during audio post-production session preparation. To consolidate a film’s audio requirements—such as the sound effects, dialogue, and Foley—the Supervising Sound Editor will need to create a DAW master template that can house all the necessary audio tracks. These templates can be created using software like Ableton, Logic, or Pro Tools. For instance, in Pro Tools, the Supervising Sound Editor will need to have monitor mixes routed and the inputs/outputs trimmed down. This helps them locate files, such as the ones that contain Foley effects, efficiently.
Apart from that, this professional will need to organise intensive editing sessions with Foley Artists to get the best results for Spot Effects—which are used to cover obvious sounds on screen, like vehicles and doors. Spot Effects are most prominent in action films, as these movies may entail a lot of gunshots and fist punches. As such, a Supervising Sound Editor and Foley Artist must work side-by-side to improve the sounds captured on the production tracks.

In her interview with the Royal Television Society, Ruth shared that a Re-Recording Mixer decides if a Foley effect's required to accentuate a movement or sound. Primarily, Re-Recording Mixers balance the audio as it’s recorded. As a result, they can help Foley Artists identify and address issues like background noise, distortion, or echo when trying to generate simple sound effects. That said, utilising the right sound equipment, like a reliable microphone, is essential for these collaborative sessions.
As this guide by Shout4Music discusses, the characteristics of a great microphone include a balanced audio response and sensitivity. For increased convenience, the item should also come with its own pop filter and shock mount. These features will enable Foley Artists and Mixers to get up close with the source. In other instances, Foley Artist Barnaby Smith shared on this feature by The Guardian that he once held a microphone in his mouth as he hit himself in the stomach—allowing him to capture realistic sounding punches. Finally, having a trusty equaliser is ideal if the Mixer and Foley Artists agree that a certain Foley effect needs to be emphasised. This equipment can cut out any unnecessary cracklings or rumbles—all so the sound is clearer.

According to the dBS Institute of Sound and Digital Technologies, smaller-scale film productions can combine the role of Foley Artist and Sound Designer. However, for companies working with a higher budget, the aforementioned roles can be undertaken by two separate individuals. Now, as discussed by the IPR College of Creative Arts, prior to choosing Foley props, Sound Designers will assess the film’s footage and produce a list of sound effects needed. Because these professionals usually know which sounds will enhance a movie best, Foley Artists need to consult with them to properly create and execute the required sounds. For instance, to generate a creaking sound, Sound Designers can recommend props such as an old chair for Foley Artists to leverage. Ultimately, this kind of feedback is crucial to achieving great outputs.
By closely collaborating with the sound department, Foley Artists can produce detailed and sharp sound effects that can enhance a film’s overall quality.
Learn the best export settings and workflow in DaVinci Resolve to seamlessly deliver audio and video assets to your sound designer.

March 28, 2023
Welcome to Part 2 of "How to Deliver Audio and Video Assets to Your Sound Designer". This short guide provides the best settings for exporting an AAF file from DaVinci Resolve for Pro Tools.
Let's take a quick review of the steps to get your video assets ready.
Navigate to your software’s video export window, and select the following settings:
Let's run over the key steps of getting your audio content ready - quickly and easily.
Ensure your sound team has easy access to all audio takes recorded on set. Upload the files to a file-sharing service, like Google Drive, and give them the ability to stream selected files or download them at their convenience.
Ensure the utmost efficiency in your workflow and prevent delays by completing the final locked edit of your project (this can be done before incorporating any colour grading or visual effects).
Place all current dialogue tracks, ADR, voice-over, sound effects, and music at their desired timecode position in your editing session.
Placing a 1kHz sine wave of a single frame duration two seconds before the video region starts can ensure that the final mix from audio post-production is perfectly synchronised with your edit’s timecode. This saves you time and effort in achieving proper sync alignment. The video region should start at timecode 01 00 00 00, unless your distribution specifications say otherwise.
Delivering With DaVinci Resolve:
Ensure that your audio clips are displayed with individual microphones on separate tracks.

Navigate to the delivery window, and select the following settings:
Render Settings - Pro Tools
Video Tab

Audio Tab

We hope you enjoyed reading this guide and have gained some useful knowledge to take forward into your next project!

We share with you 5 tips to help you kickstart your career in the world of sound.
March 21, 2023
For many budding sound designers, it can be difficult knowing how to make the jump from amateur level up to professional.
In this article we share with you 5 tips to help you kickstart your career in the world of sound, and confidently land your first paying projects.
Read on below to discover our top tips!
How can you hit the target if you don't have something to aim for? Setting a clear goal for yourself is like a superpower, as it not only narrows your focus but gives you a clear path to follow as you try to achieve your dreams. Often we are too vague in our goals, and make grand, sweeping statements that are difficult to put into practice.
Instead of saying "I want to make sounds for film", or "I want to be a foley artist" we can instead say things like:
By making our goals super specific, and setting a timeline to accompany them we are placing ourselves on the right path to achieve them.

When starting out, it is beneficial to equip yourself with a wide set of skills. This will give you the strongest foundation possible to start with, and puts you in prime position to land the job you want when it comes up.
Think about it like this, if its a choice between two young candidates for a junior position, who is going to be more attractive: The person who is amazing in one aspect of sound but lacks knowledge elsewhere, or this person who has a general knowledge and competency across the full range of sound disciplines?
Specialisation is important however, but this can come later as you progress in your career and have gained a high level of expertise in certain areas.
Some key skills and areas of knowledge to develop include:

Knowing how to present yourself in a professional manner, and effectively sell your services is one of the key skills to master on your journey to success. When starting out its a good idea to invest in a quality website that you can continue to update as you progress in your career. Populate your website with your best pieces of work, and highlight the key projects you have been involved with. Pay close attention to the words you choose to say about yourself on your website and make sure that all written information projects a positive and confident impression.
You can take things to the next level by hiring the services of a professional photographer to take some photos and headshots of you. A good set of photos can be carried with you through your career.
The "essential" areas of your professional portfolio would include the following:

All business is fundamentally built on the foundation of strong Human relationships.
With the world of the creative industries being so collaborative, it is extra important for us to be skilled in the art of networking, and never is this more true then when you are first starting out. Often its the relationships you build during the early stages of your career that will stay with you the longest and be the most fruitful.
Take an interest in people, offer them advice and do favours for them from time to time. Perhaps a Director acquaintance of yours is looking for a DOP. Hook them up with one, or point them in the direction of someone you know. This all helps to position yourself as a competent, well-connected and respected professional that brings a high level of value to the projects you are involved with.

For our final tip, we recommend to seek out opportunities at established sound studios. Whilst this is probably the most traditional and predictable tip on this list, it still remains one of the best ways of getting your foot-in-the-door when it comes to a career in audio. A quick google search of your local area should reveal some of the studios that are in operation, and from there you can go forward and make contact.
Don't be afraid to pick up the phone and strike up a conversation. Most people, no matter how senior will be empathetic to your situation, as they can remember what is was like when they were first starting out. With a little initiative and luck on your side you may just land yourself a placement or work opportunity!
That concludes this blog post. For more tips you can check out this great article from the Los Angeles Times that features quotes and advice from some of the top professionals in the industry.
We hope you enjoyed reading these tips and can start applying them to your own journey today!

Explore the sound design of a Nordic fantasy film, blending historical accuracy with mythical elements to create an immersive, otherworldly atmosphere.

March 15, 2023
We recently had the pleasure to collaborate on a Nordic-themed fantasy film, which was an incredible experience. This project allowed us to create sounds using historically accurate weapons and armour, and gave us the opportunity to build an environment abundant in texture. However, since it was a fantasy film, the soundtrack had to be steeped in myth and magic, yet still retain an earthly sound.
A great way to motivate and energize yourself and/or your team for a big new project is to organize a planning session for the post-production journey of the film. It's beneficial to be part of the sound design discussion right from the beginning with the director in order to ensure success. The earlier you start involvement, the better.
During our brainstorming with the director, we decided that the soundscape should include hyper-realistic original sound effects. Showcasing earthly sounds such as rain and thunder, as well as historically accurate foley of chainmail, shields, swords, and the otherworldly sound design of an oracle and supernatural raven.
The film features a supernatural raven that can ensnare and disturb the mind of anyone who looks upon it. For these more mystical scenes, we wanted to ensure that the fantasy elements still had an air of realism. We opted for abstract interpretations of natural noises, using recordings of thunder, wind, and earthquakes to create whooshes, risers, transitions, and dopplers. These natural elements are then used to underscore the gurgling croaks, scratchy caws, and haunting shrieks of a raven.
We hope you enjoyed checking out this article! How would you have approached this scene?