
Continuing on from our last post about building your own foley pits, in this article, we’ll give you a short tutorial on how to install a surface into your foley pit.
Like with any project, pre-production is an integral part of the process. Working out the exact surface you want to create, it’s dimensions and knowing the materials and tools you’ll need is vital for tackling any D.I.Y. job.
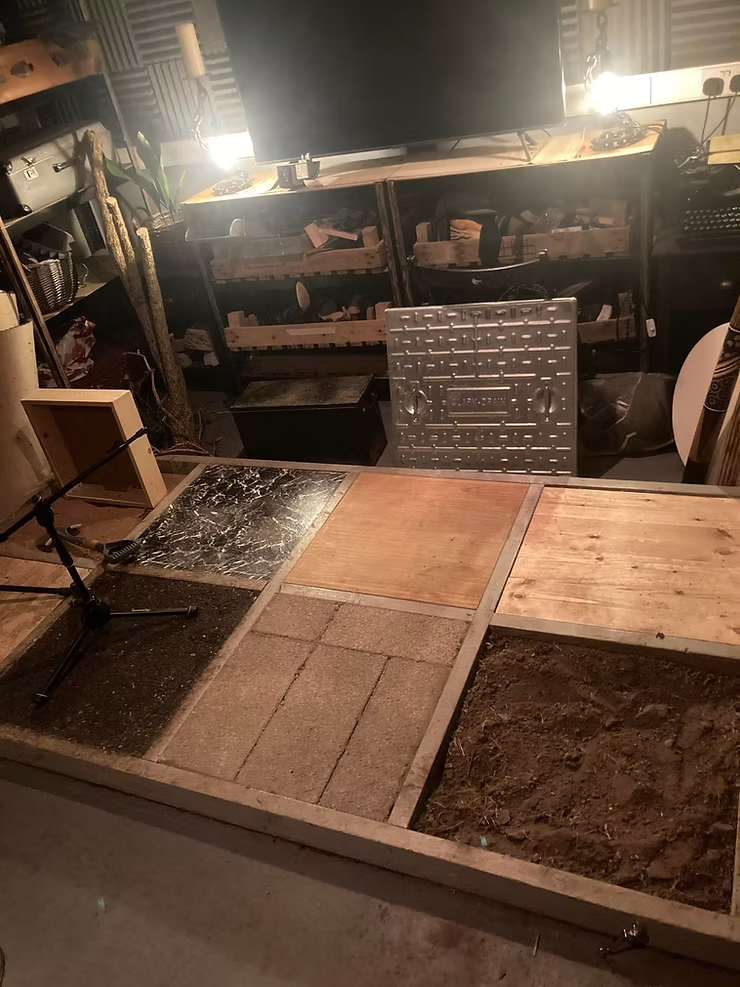
For our surface we’ve chosen to build a solid hardwood floor in one of our 2x2 foot sections. For this we’ll need wood for the joists and floorboards, oil to treat the wood, rockwool, screws, a screwdriver, nails and my personal favourite a big hammer.
We went to our local wood merchant where the staff cut and sanded the wood for us, but if you choose to cut your own wood you’ll also need a saw/cutting tool and sandpaper to smooth out any rough edges.
Because we’re building a solid wood floor the joists are vital to create the strong sound of the surface.
We screwed 3 joists into the existing frame, but you could comfortably use 4 or 5 joists for a surface this size for even more stiffness
We than filled any gaps between the joists with rockwool to reduce as many hollow resonances as possible.
Be sure to use gloves and a mask when handling rockwool, this stuff is really itchy.

Now for the fun bit! Once the space is filled with rockwool, you can now start nailing the floorboards to the joists with a hammer. Use two nails at each point that a floorboard passes over a joist. Because have 3 joists each floorboard will need 6 nails.
TREATMENT: Once you’ve gone to town with your hammer and all the floorboards are fitted you can finish by treating the wood with oil. We used Tung Oil on our surface, this is a great organic oil that colours the wood beautifully.
Finally, once the oil has dried you’re ready to get stepping!
We hope you enjoyed checking out this article.
You can find part 1 of this article via the link below:
https://www.344audio.com/post/article-how-to-build-a-d-i-y-foley-pit
Stay tune for more educational content like this in future blog articles.

344 Audio is an Audio Post Production Company in Manchester.
If you enjoyed this post, discover our Ultimate Guide to Audio Post-Production.
Curious to hear our work? Listen to our portfolio.
Eager to learn more about audio post production and sound design? Explore our Audio Post Essentials Course at 344 Academy.
We also have unique sound effects available for purchase.